Blanching Vegetables is Easy
Blanching and freezing vegetables is one of the easiest ways to preserve summer's harvest.
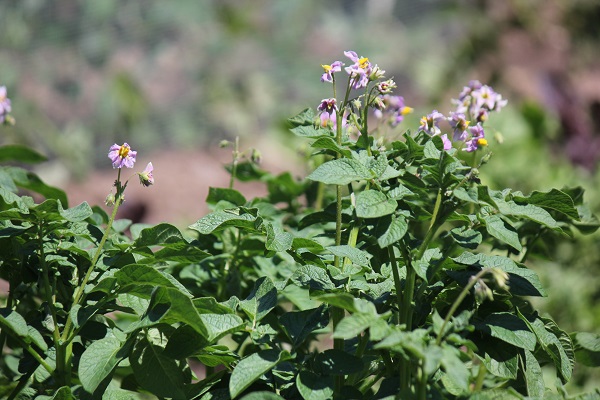
A lot of tender loving care has gone into your vegetable garden and now comes the reward - an abundance of vegetables. Harvesting vegetables from a home garden is satisfying - digging potatoes and carrots out of the earth - plucking beans and squash from a bush. A sense of pride and accomplishment comes from knowing that you've grown your own food, that it's GMO free and wholesome for your family.
But wait! You've got more than you you know what to do with. It's time to preserve your vegetables.
Not everyone has the resources to preserve through home-canning procedures, and due to the risks associated with home-canning summer squash and pumpkin, blanching (and then freezing) is an easy method for keeping your produce at its best for later use.
While some of our organic vegetables such as green beans and tomatoes were pressure canned, much of our garden produce was blanched and then frozen.
It's a simple method that acquires only a few steps to complete.
Once the water begins to boil, put a handful or two of vegetables into the water. Do not overcrowd the pot with your vegetables. You may need to do this step in several batches. Bring to a second boil. Time the boiling process according to the chart below. It usually takes only a few minutes for the vegetables to be ready. When complete, remove the vegetables and plunge into your bowl of ice water. This stops enzyme growth and the cooking process, thereby preserving food quality. Next, drain your vegetables well, put them into freezer bags, and freeze for future use.
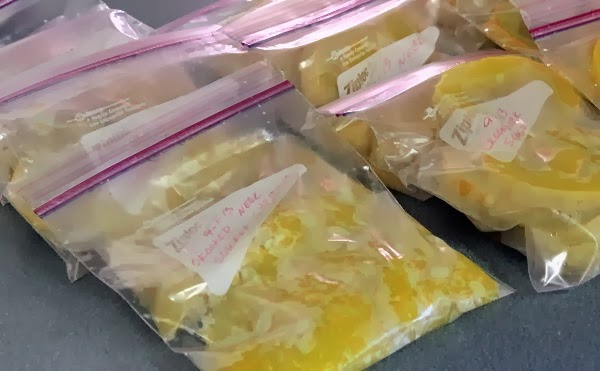 |
| Crooked Neck Summer Squash that has been blanched and ready for freezing. |
A lot of tender loving care has gone into your vegetable garden and now comes the reward - an abundance of vegetables. Harvesting vegetables from a home garden is satisfying - digging potatoes and carrots out of the earth - plucking beans and squash from a bush. A sense of pride and accomplishment comes from knowing that you've grown your own food, that it's GMO free and wholesome for your family.
But wait! You've got more than you you know what to do with. It's time to preserve your vegetables.
Not everyone has the resources to preserve through home-canning procedures, and due to the risks associated with home-canning summer squash and pumpkin, blanching (and then freezing) is an easy method for keeping your produce at its best for later use.
While some of our organic vegetables such as green beans and tomatoes were pressure canned, much of our garden produce was blanched and then frozen.
It's a simple method that acquires only a few steps to complete.
1. Prepare your vegetables. Clean and scrub off any soil. If you are working with vegetables such as carrots, or fruits like summer squash, slice them into 1 inch slices or chunks. Other vegetables can remain whole, such as green beans. But you should trim the stems of leafy vegetables, like spinach.
2. To a large pot, such as a dutch oven or stock pot, add water to about 3 inches from the top. The idea is to have a lot of water circulating around your vegetables. Place pot on the stove and bring the water to a boil.
3. Fill a large bowl with ice water. Ice cubes can be put into the water to maintain the cold temperature. Depending on how much blanching you need to do, you may have to empty the bowl and refill with cold water several times. The point is to have cold water, not lukewarm.
Once the water begins to boil, put a handful or two of vegetables into the water. Do not overcrowd the pot with your vegetables. You may need to do this step in several batches. Bring to a second boil. Time the boiling process according to the chart below. It usually takes only a few minutes for the vegetables to be ready. When complete, remove the vegetables and plunge into your bowl of ice water. This stops enzyme growth and the cooking process, thereby preserving food quality. Next, drain your vegetables well, put them into freezer bags, and freeze for future use.
Blanching Times*
| Vegetable | Blanching Time (minutes) |
|---|---|
Artichoke-Globe
(Hearts) | 7 |
| Artichoke-Jerusalem | 3-5 |
| Asparagus Small Stalk Medium Stalk Large Stalk | 2 3 4 |
| Beans-Snap, Green, or Wax | 3 |
| Beans-Lima, Butter, or Pinto Small Medium Large | 2 3 4 |
| Beets | cook |
| Broccoli (flowerets 11/2 inches across) Steamed | 3 5 |
| Brussel Sprouts Small Heads Medium Heads Large Heads | 3 4 5 |
| Cabbage or Chinese Cabbage (shredded) | 1 1/2 |
| Carrots Small Diced, Sliced or Lengthwise Strips | 5 2 |
| Cauliflower (flowerets, 1 inch across) | 3 |
| Celery | 3 |
| Corn Corn-on-the-cob Small Ears Medium Ears Large Ears Whole Kernel or Cream Style (ears blanched before cutting corn from cob) | 7 9 11 4 |
| Eggplant | 4 |
| Greens Collards All Other | 3 2 |
| Kohlrabi Whole Cubes | 3 1 |
| Mushrooms Whole (steamed) Buttons or Quarters (steamed) Slices steamed) | 5 3 1/2 3 |
| Okra Small Pods Large Pods | 3 4 |
| Onions (blanch until center is heated) Rings | 3-7 10-15 seconds |
| Peas-Edible Pod | 1 1/2-3 |
| Peas-Field (blackeye) | 2 |
| Peas-Green | 1 1/2 |
| Peppers-Sweet Halves Strips or Rings | 3 2 |
| Potatoes-Irish (New) | 3-5 |
| Pumpkin | cook |
| Rutabagas | 3 |
| Soybeans-Green | 5 |
| Squash-Chayote | 2 |
| Squash-Summer | 3 |
| Squash-Winter | cook |
| Sweet Potatoes | cook |
| Turnips or Parsnips Cubes | 2 |
*blanching times are for water blanching unless otherwise indicated.
Source for this chart was The National Center for Home Food Preservation.
_________________________
TIPS: When blanching, changing the water between batches is unnecessary, but do change it between different types of vegetables so as not to transfer flavors.
After blanched vegetables have been sealed in freezer bags and dated, lie them on a flat surface to cool. Store bags vertically in freezer for optimum space saving advantages.

Comments
Post a Comment
Thanks for your comments!